title: Mastering Guitar Pedal Order: A Comprehensive Guide for Perfect Tone
1. Understanding the Basics: The Order of Guitar Pedals
2. Overdrive vs. Distortion: Which Comes First?
3. Arranging Your Pedals: Tips for Optimal Setup
4. Reverb and Delay: Finding the Right Sequence
5. The Looper Dilemma: Should It Go in the Effects Loop?
Introduction: Mastering the order of guitar pedals is an essential skill for any guitarist aiming to achieve the perfect tone. This comprehensive guide will help you understand the basics of pedal arrangement, the nuances between overdrive and distortion placement, tips for optimal setup, and the ideal sequence for reverb and delay. Additionally, we’ll address the common dilemma of where to place your looper pedal. By following these guidelines and experimenting with different configurations, you’ll be well on your way to creating a unique and refined sound that enhances your musical expression.
1. Understanding the Basics: The Order of Guitar Pedals
When it comes to achieving the perfect tone, the order in which you arrange your guitar pedals can significantly impact your sound. Understanding the basics of pedal order is essential for any guitarist looking to refine their setup and unlock new sonic possibilities.
The general consensus among musicians is to follow a traditional signal chain. However, it’s important to remember that creativity and experimentation often lead to unique and personalized tones. Here’s a basic guideline to get you started:
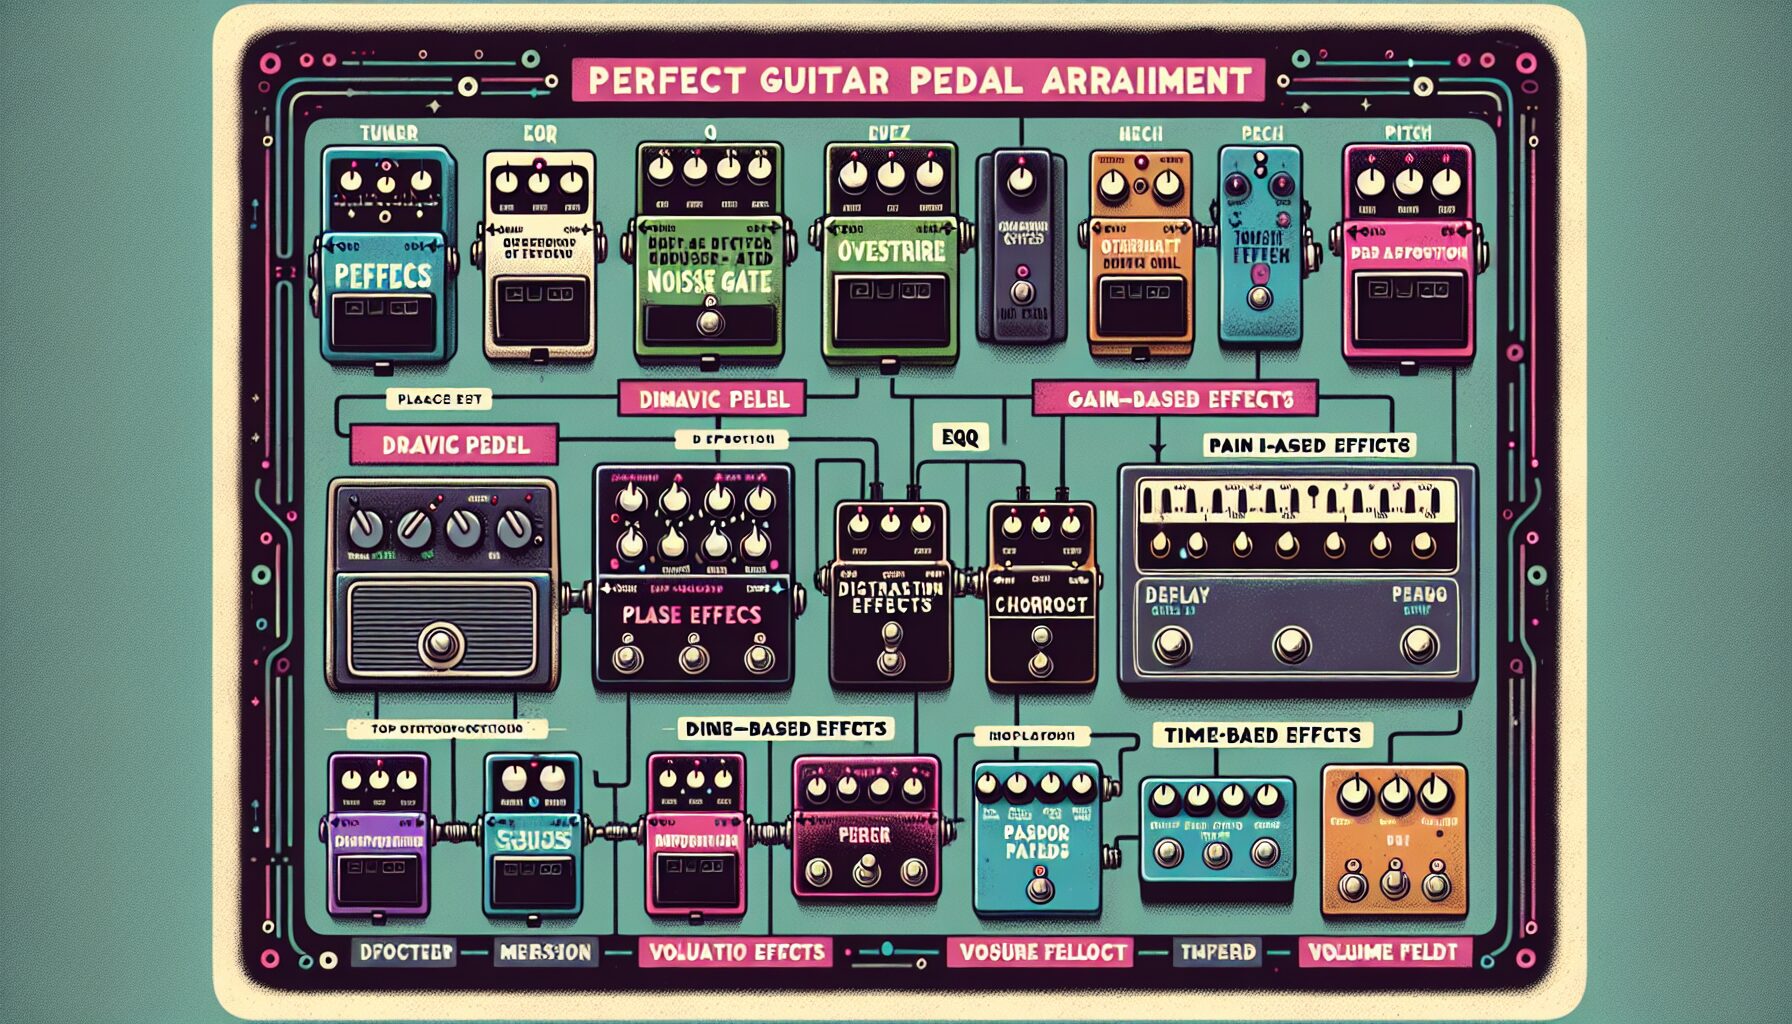
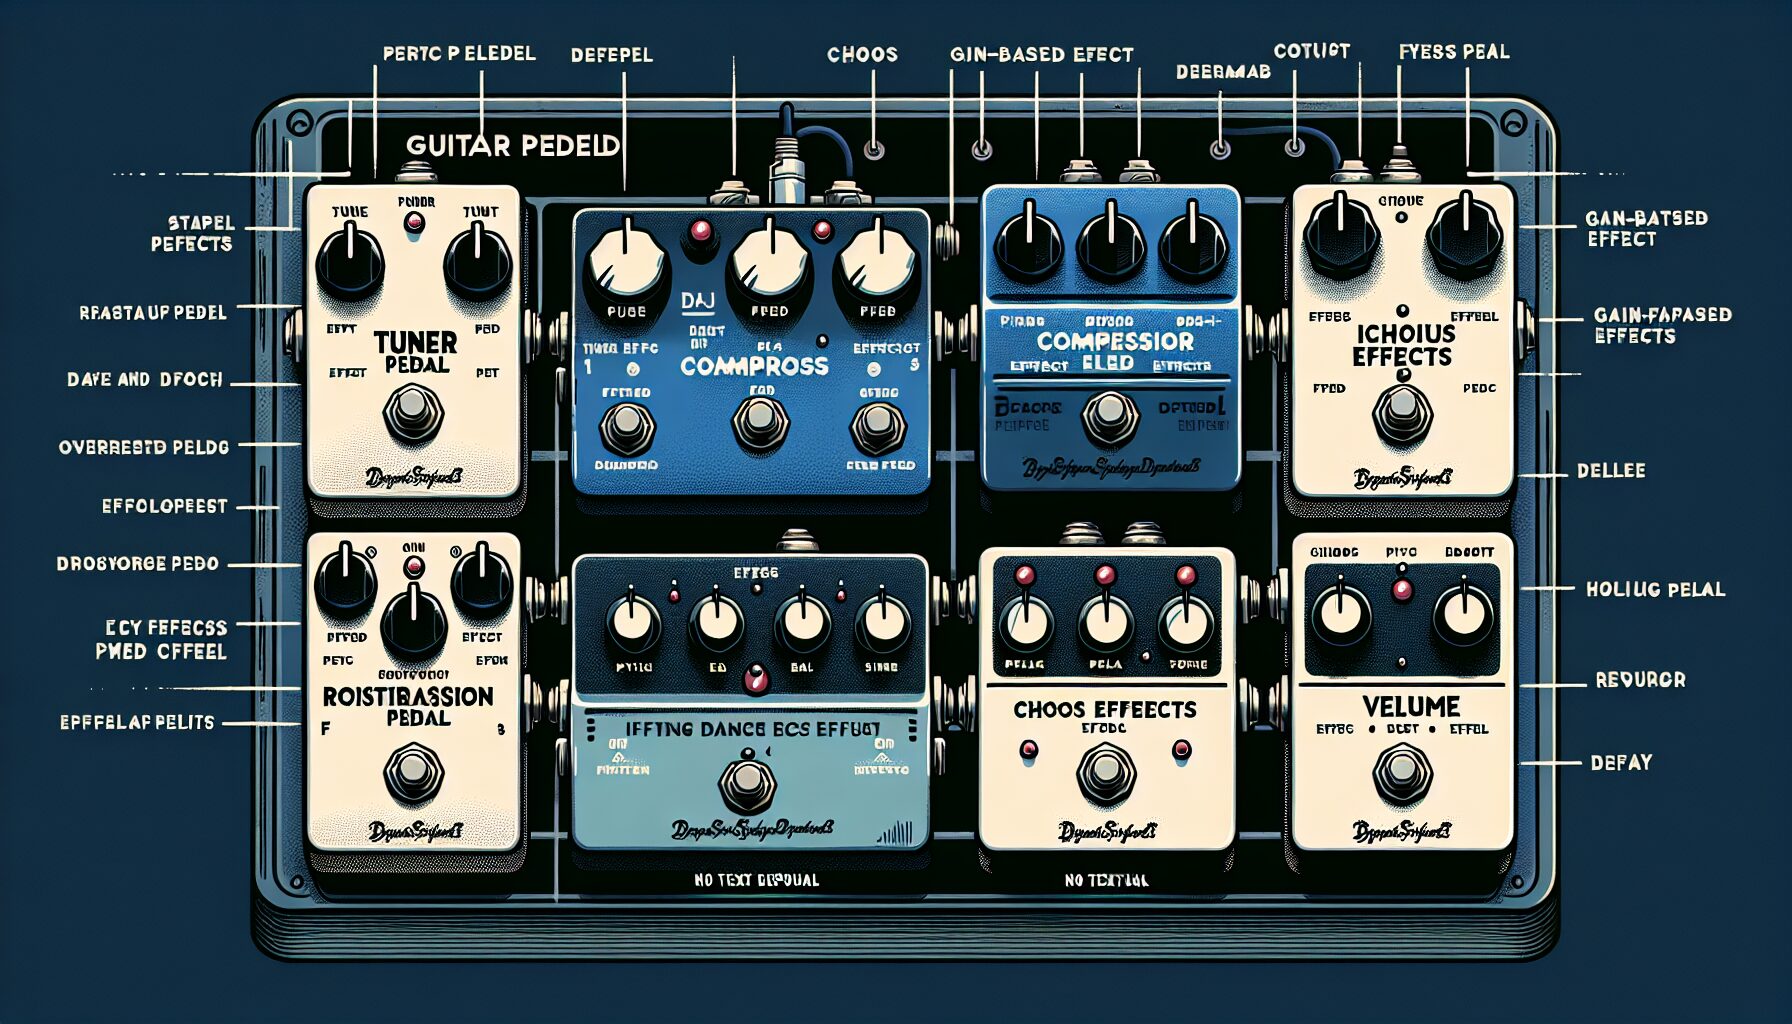
1. Tuner Pedal: Place your tuner pedal first in the signal chain. This ensures that it receives the cleanest signal possible, allowing for accurate tuning.
2. Dynamic Effects: These include pedals like compressors and noise gates. A compressor can help even out your playing dynamics, while a noise gate reduces unwanted noise. Placing these early in the chain ensures they process the cleanest signal, providing more effective results.
3. Gain-Based Effects: Overdrive, distortion, and fuzz pedals typically come next. These pedals shape the core of your tone by adding varying degrees of gain and saturation. Placing them after dynamic effects ensures that the compressed or gated signal gets properly driven by these gain stages.
4. EQ and Pitch Effects: Equalizers and pitch-shifting pedals should follow gain-based effects. An EQ pedal allows you to fine-tune your tone by boosting or cutting specific frequencies, while pitch effects like octavers or harmonizers can add layers to your sound.
5. Modulation Effects: Chorus, flanger, phaser, and vibrato pedals fall into this category. Modulation effects are generally placed after gain-based and EQ effects because they add movement and texture to the already shaped tone.
6. Time-Based Effects: Delay and reverb pedals usually come toward the end of the signal chain. These effects create a sense of space and depth, making them more effective when placed after other effects have processed the core tone.
7. Volume Pedal: If you use a volume pedal, consider placing it at the end of your chain (or just before time-based effects) to control the overall output level without altering the characteristics of your other effects.
While this order is widely accepted as a starting point, don’t be afraid to experiment with different configurations. For instance, some guitarists prefer placing their delay pedal before their overdrive to achieve a more vintage-sounding echo effect.
Additionally, using a pedalboard can help keep your setup organized and make it easier to swap out pedals for testing different orders. Pay attention to how each change affects your overall sound and adjust accordingly.
Remember that understanding these basics is just the beginning of mastering guitar pedal order. The key is to listen carefully and let your ears guide you towards the perfect arrangement for your unique playing style and tonal preferences.
2. Overdrive vs. Distortion: Which Comes First?
When it comes to arranging your guitar pedals, the placement of overdrive and distortion can significantly impact your overall tone. Both pedals are designed to add grit and sustain to your sound, but they do so in different ways. Understanding the nuances of each effect and how they interact with one another is crucial for achieving the perfect tone.

The Characteristics of Overdrive and Distortion
Overdrive pedals emulate the natural breakup of a tube amplifier being pushed to its limits. They offer a more subtle, dynamic response that can range from a slight boost to a crunchy sound. Overdrive tends to preserve the nuances of your playing, making it ideal for blues, rock, and other genres where touch sensitivity is key.
Distortion pedals, on the other hand, provide a more aggressive, saturated sound that is less dependent on your playing dynamics. They are capable of producing high-gain tones with a lot of sustain, making them suitable for heavier genres like metal and hard rock.
The Importance of Pedal Order
The conventional wisdom in pedal placement suggests that overdrive should come before distortion. This sequence allows you to stack the effects in a way that retains clarity and articulation.
1. Overdrive into Distortion: Placing overdrive before distortion means that your overdriven signal will hit the distortion pedal next. This setup can add complexity to your tone without overwhelming it. The overdrive pedal acts as a boost, enhancing the distortion pedal’s characteristics while maintaining note definition.
2. Distortion into Overdrive: While less common, some players prefer this order for specific tonal reasons. Placing distortion before overdrive can result in a more compressed and saturated sound. However, this setup can sometimes lead to muddiness, especially if both pedals are high-gain.
Practical Examples
To understand how these configurations affect your tone, consider two practical examples:
– Blues/Rock Setup: If you’re aiming for a classic blues or rock sound, start with an overdrive pedal like the Ibanez Tube Screamer or Boss SD-1. Follow it with a distortion pedal such as the Pro Co Rat or Boss DS-1. This arrangement allows you to use the overdrive for light crunch and then kick in the distortion for solos or heavier sections.
– Metal/Hard Rock Setup: For heavier genres, you might use a high-gain distortion pedal like the Boss Metal Zone first to achieve your core sound. You could then place an overdrive pedal like the Maxon OD808 after it to tighten up the low end and add clarity.
Experimentation is Key
While there are general guidelines, the best way to find your ideal pedal order is through experimentation. Every rig is different, and what works for one guitarist might not work for another. Spend some time swapping the order of your overdrive and distortion pedals to see how each configuration affects your tone.
Additional Tips
– Use Your Ears: Trust your ears more than any rule or guideline. If something sounds good to you, it’s probably right.
– Consider Your Amp: The type of amplifier you use can also influence how these pedals interact. A high-gain amp might require different pedal settings than a clean amp.
– Dial in Settings Carefully: Small adjustments in gain, tone, and level controls can make a big difference in how your pedals stack together.
By thoughtfully considering the placement of your overdrive and distortion pedals and experimenting with different configurations, you’ll be well on your way to mastering your guitar pedal order for perfect tone.
3. Arranging Your Pedals: Tips for Optimal Setup
Arranging your guitar pedals in the optimal order can be a game-changer for your tone and overall sound quality. While there’s no one-size-fits-all solution, there are some tried-and-true guidelines that can help you get the most out of your effects. Here are some tips to consider when setting up your pedalboard:
1. Start with Dynamics
Dynamics pedals, such as compressors and wah-wah pedals, should generally be placed at the beginning of your signal chain. Compressors help to even out your playing dynamics, ensuring that softer notes are more pronounced and louder notes are tamed. This creates a more consistent signal for the rest of your pedals to process. Wah-wah pedals, on the other hand, need to be placed early to properly interact with the unaltered guitar signal, allowing them to produce their signature sweeping sounds effectively.
2. Overdrive and Distortion
Next in line should be your overdrive and distortion pedals. These effects shape the core of your guitar’s tone by adding gain and saturation. Placing them after dynamics ensures that the compressed signal is driven into these pedals, resulting in a smoother and more controlled distortion or overdrive sound. If you use multiple gain stages (like stacking overdrive and distortion), experiment with their order to find the combination that works best for your style.
3. Modulation Effects
Modulation effects like chorus, phaser, and flanger typically come after overdrive and distortion in the signal chain. These effects add movement and texture to your sound, and placing them post-distortion allows them to modulate a more harmonically rich signal. This placement helps in retaining clarity and definition in your modulation effects.
4. Time-Based Effects: Delay and Reverb
Time-based effects such as delay and reverb usually come towards the end of your signal chain. Delay pedals repeat the incoming signal at set intervals, while reverb adds a sense of space and depth. Placing these effects last ensures that all previous tonal shaping is preserved before adding the ambient characteristics provided by delay and reverb.
5. Volume Pedals
Volume pedals can be placed in different positions depending on how you intend to use them. Placing a volume pedal at the beginning of your chain allows you to control the overall input level going into your effects, which can be useful for swells or dynamic control. Placing it at the end allows you to adjust the final output volume without affecting the interaction between other pedals.
6. Noise Suppressors
Noise suppressors or gates should generally be placed at the end of your chain to minimize unwanted noise introduced by other pedals. However, if you’re dealing with high-gain setups, placing a noise suppressor after your gain stages but before time-based effects can effectively cut noise without muting delays or reverbs.
7. Experimentation is Key
While these guidelines offer a solid starting point, personal preference plays a significant role in pedal arrangement. Different genres, playing styles, and specific gear combinations can yield unique results when experimenting with pedal order. Don’t hesitate to swap pedals around and see how it affects your sound.
8. Consider Signal Chain Integrity
Using high-quality patch cables and power supplies is crucial for maintaining signal integrity throughout your pedalboard. Poor connections or inadequate power can introduce noise and degrade your tone.
By following these tips and keeping an open mind towards experimentation, you’ll be well on your way to mastering the art of pedal arrangement for optimal setup. Remember, the ultimate goal is to create a setup that serves your musical vision and enhances your playing experience.
4. Reverb and Delay: Finding the Right Sequence
When it comes to arranging your guitar pedals, reverb and delay often pose a unique challenge. These two effects can dramatically shape your soundscape, and their placement in the signal chain can make a significant difference. Understanding where to position reverb and delay will help you achieve the perfect tone for your playing style.
The Basics of Reverb and Delay
Reverb simulates the sound reflections in a physical space, adding depth and ambiance to your guitar tone. It’s often used to create a sense of space and is essential for genres ranging from rock to ambient music.
Delay, on the other hand, repeats your guitar signal at set intervals, creating an echo effect. It can be used subtly to thicken your sound or more prominently for rhythmic patterns and complex soundscapes.
General Guidelines
A common rule of thumb is to place time-based effects like reverb and delay towards the end of your signal chain. This placement allows these effects to process the final output of your other pedals, resulting in a more natural and cohesive sound. However, there are nuances to consider:
1. Reverb Last: Reverb is typically placed at the very end of the signal chain. This ensures that all other effects are processed first, with reverb adding the final touch of ambiance. Placing reverb last helps maintain clarity, as it avoids muddying the individual effects applied earlier in the chain.
2. Delay Before Reverb: Delay usually sits just before reverb. This sequence allows the delay repeats to be enriched by the reverb, creating a lush and expansive sound. Placing delay before reverb also prevents the echoes from becoming too indistinct or washed out.
Experimenting with Placement
While general guidelines provide a solid starting point, experimenting with pedal order can yield unique results tailored to your preferences:
– Delay After Reverb: Some players prefer placing delay after reverb for a more pronounced echo effect. This setup can create interesting textures, especially when using long delay times or multiple repeats. However, be mindful that this configuration may result in a less natural sound.
– Parallel Processing: Advanced setups might involve splitting your signal into two paths, allowing you to process delay and reverb separately before recombining them. This technique offers precise control over each effect but requires additional equipment like a mixer or switcher pedal.
Practical Tips
– Use Your Ears: Trusting your ears is crucial when determining pedal order. Spend time experimenting with different configurations to find what sounds best to you.
– Consider Your Playing Environment: If you frequently play live or record in various settings, adaptability is key. Ensure that your pedalboard setup works well across different environments.
– Pedal Quality Matters: High-quality pedals often interact better with each other, resulting in a cleaner and more defined sound. Investing in good reverb and delay units can make a noticeable difference.
In conclusion, finding the right sequence for reverb and delay is essential for mastering your guitar tone. While traditional wisdom suggests placing them towards the end of your signal chain, personal experimentation will ultimately guide you to the setup that best suits your musical needs. Happy playing!
5. The Looper Dilemma: Should It Go in the Effects Loop?
When it comes to using a looper pedal, placement within your pedal chain can significantly impact your overall sound. One of the most debated topics among guitarists is whether the looper should be placed in the effects loop or directly in the signal chain before the amplifier. Each option offers unique advantages and can suit different playing styles and needs. Here, we’ll break down both approaches to help you make an informed decision.
Placing the Looper in the Effects Loop
The effects loop is a circuit between your preamp and power amp stages of your amplifier, designed for time-based and modulation effects. By placing your looper here, you can capture the sound of your entire pedalboard, including any distortions, overdrives, or other preamp effects.
# Advantages:
1. Complete Signal Capture: When you place your looper in the effects loop, it records everything that comes before it, including all your pedals and the preamp section of your amplifier. This allows you to loop a complete tone, giving you a more cohesive sound.
2. Flexibility in Performance: Having your looper capture the entire signal means that any changes you make during playback (such as switching pedals on and off) will be layered over the original loop. This provides great flexibility for live performances where dynamic changes are essential.
3. Cleaner Sound: Since the effects loop typically handles line-level signals rather than instrument-level signals, it can provide a cleaner recording for your loops.
# Disadvantages:
1. Complex Setup: Integrating a looper into an effects loop can complicate your pedalboard setup, requiring additional cables and possibly a better understanding of your amp’s loop capabilities.
2. Potential Volume Issues: Depending on how your amp’s effects loop is designed, you might experience volume discrepancies between your live playing and recorded loops. This may necessitate further adjustments or even additional gear like a buffer or volume pedal.
Placing the Looper Before the Amplifier
Putting your looper pedal directly in your signal chain before it hits the amplifier is another popular method. This approach captures your guitar’s raw signal before any amplification or significant effect processing.
# Advantages:
1. Simplicity: This method is straightforward and easy to set up, making it ideal for those who want to avoid complicated wiring or technical issues.
2. Direct Control: By looping a dry signal, you have complete control over how each effect alters both your live playing and the loops independently. This can be particularly useful for practice sessions where you want to experiment with different sounds.
3. Pedalboard Compatibility: Most looper pedals are designed with this placement in mind, ensuring optimal performance without additional adjustments.
# Disadvantages:
1. Limited Sound Sculpting: Since the looper captures only the raw guitar signal, any changes made after recording will not affect the loop itself. This could limit creative options during live performances.
2. Potential for Muddy Tones: If you’re using heavy distortion or multiple modulation effects after the looper, these could muddy up when layered over each other during playback.
Making Your Decision
Ultimately, where you place your looper pedal depends on what you aim to achieve with it. If you’re looking for comprehensive control over every aspect of your tone and enjoy a cleaner signal path, placing it in the effects loop might be best for you. On the other hand, if simplicity and direct manipulation of individual loops are more important, placing it before your amplifier will serve you well.
Experiment with both setups to see which one suits your playing style and sonic preferences best. Happy looping!
Conclusion:
Achieving the perfect tone involves more than just having the right pedals; it requires a thoughtful approach to their arrangement. By understanding the basics of pedal order, experimenting with the placement of overdrive and distortion pedals, optimizing your setup, and finding the right sequence for reverb and delay, you can unlock new sonic possibilities. Whether you decide to place your looper pedal in the effects loop or directly in your signal chain, the key is to let your ears guide you towards a setup that complements your playing style. With this guide as your starting point, you’re now equipped to master guitar pedal order and elevate your sound to new heights.